
These frozen treats are a perfect combination of sweet, creamy bananas and rich, indulgent chocolate. Whether you’re looking for a refreshing snack on a hot day or a fun and healthy dessert option, chocolate covered banana pops are sure to satisfy your cravings.
We’ll explore the simple ingredients, easy steps, and even offer some creative variations and substitutions to make this treat uniquely yours. So, let’s get started and discover how to create these irresistible frozen delights! If you are looking for other delicious No Bake Vegan Desserts you can view the full collection here.
Ingredients & Substitutions
Bananas take the spotlight in this recipe, providing a sweet and creamy base. For variety, try using strawberries or pineapple chunks instead.
When it comes to the chocolate coating, vegan chocolate chips or dark chocolate are recommended. Regular dark chocolate works just as well if vegan options are unavailable. You can also experiment with different flavors like mint or orange-infused dark chocolate for a unique twist.
Chopped salted peanuts bring a delightful crunch and a hint of saltiness to balance the chocolate’s sweetness. If you have a peanut allergy or prefer other nuts, substitute with almonds, cashews, or a mix of nuts. Alternatively, explore toppings such as shredded coconut, colorful sprinkles, or crushed cookies for added texture and flavor.
Popsicle sticks or bamboo skewers are used to hold and enjoy these frozen treats. If you don’t have them, be creative with toothpicks, small forks, or repurposed wooden coffee stirrers.
Remember, the suggested substitutions are flexible, so customize based on your taste and dietary needs. Have fun experimenting with different flavors and textures to make these chocolate covered banana pops your own. Enjoy the process and savor the delicious results!
Helpful Tools
- Baking Sheet: Use a baking sheet lined with parchment paper to place the prepared banana pops. This will prevent sticking and make it easier to transfer them to the freezer.
- Double Boiler or Microwave-Safe Bowl: If you choose to melt the chocolate using a double boiler, it’s a good idea to have one on hand. Alternatively, a microwave-safe bowl can be used for melting the chocolate in short intervals if you prefer that method.
- Stirring Utensil: A spoon or spatula will come in handy for stirring the chocolate while melting it and ensuring a smooth consistency.
- Popsicle Sticks or Bamboo Skewers: To hold and enjoy the frozen banana pops, popsicle sticks or bamboo skewers are essential. Make sure you have enough of them for all the banana halves.
- Airtight Container: If you plan to store the banana pops in the freezer for future enjoyment, having an airtight container will help keep them fresh and prevent freezer burn.
How to Make Chocolate Covered Banana Pops
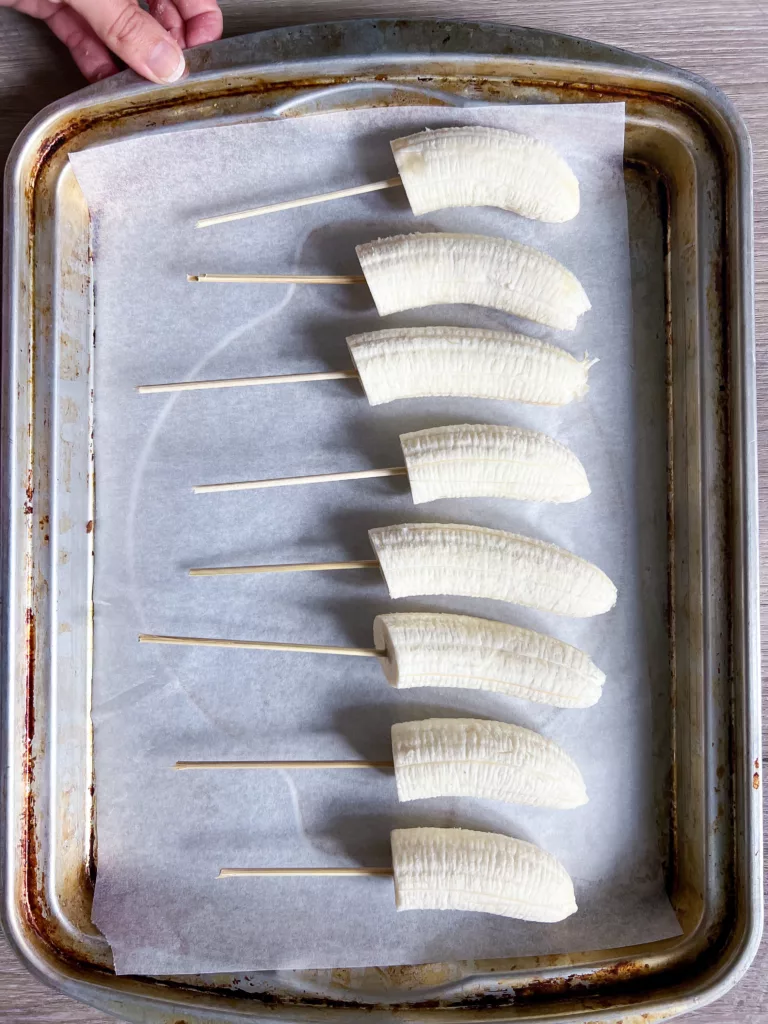
To make chocolate covered banana pops, start by covering a baking sheet with parchment paper for easy removal later. Peel the bananas and cut them in half. Insert a popsicle stick into the cut end of each banana half. Place the banana halves on the prepared baking sheet and transfer them to the freezer. Let them freeze for about 2 hours or until completely frozen.
Next, it’s time to melt the chocolate. You have two options: a double boiler or the microwave. If using a double boiler, fill the bottom pot with water and place it on the stove over low heat. Place the chocolate in the top pot and stir until melted and smooth. If using the microwave, place the chocolate in a microwave-safe bowl and heat it in 30-second intervals, stirring each time until fully melted.
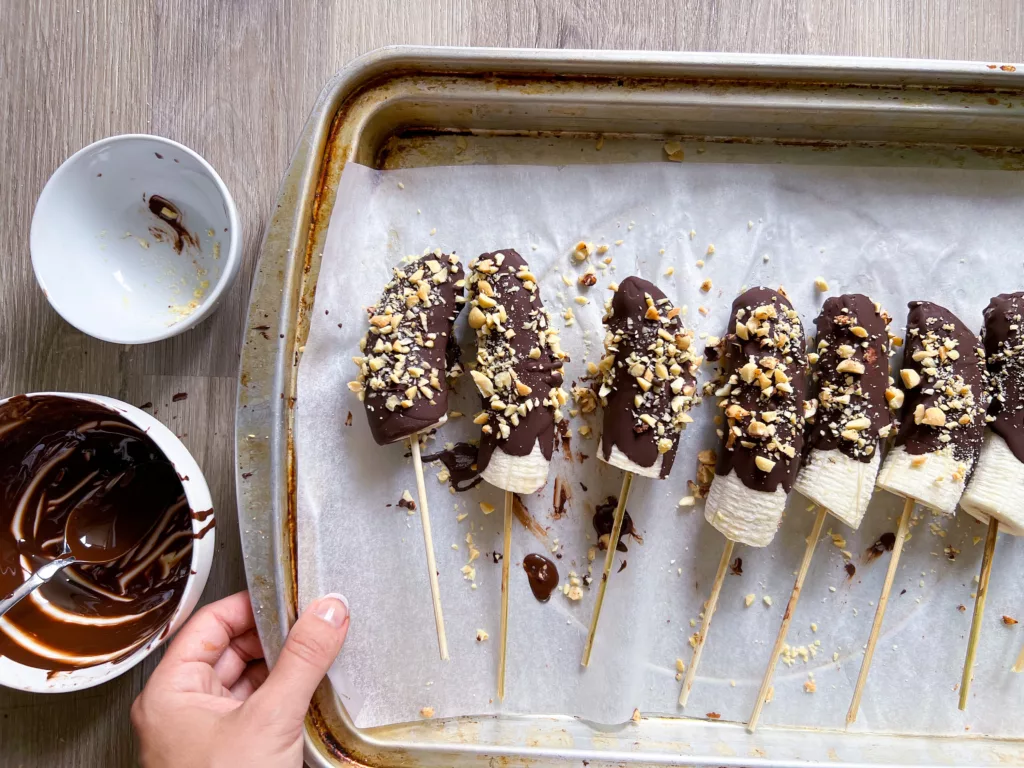
Once the chocolate is melted, it’s time to coat the frozen banana halves. Take one banana half at a time and dip it into the melted chocolate. Use a spoon to help coat the banana evenly as the chocolate gets lower in the bowl. As soon as one banana pop is covered in chocolate, quickly sprinkle the chopped peanuts or your preferred topping over it. Do this before the chocolate hardens. Repeat this process with each banana half, coating them in chocolate and adding the desired toppings.
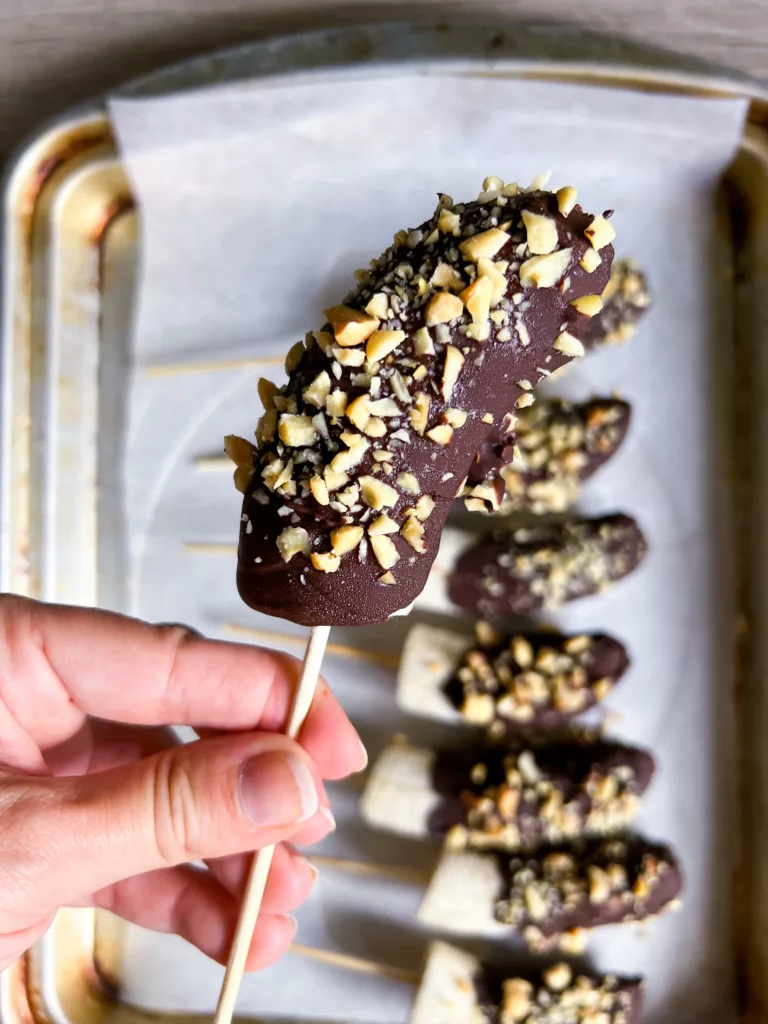
Once all the banana pops are coated and topped, you have two options. If you want to enjoy them immediately, go ahead and savor the deliciousness. If you prefer to save some for later, store them in an airtight container in the freezer. They can be kept for up to 1 month. Now you have a delightful frozen treat to enjoy whenever cravings strike.
Tips & Tricks
- Use ripe but firm bananas: Choose bananas that are ripe enough to provide natural sweetness but still firm enough to hold their shape when frozen and coated in chocolate.
- Pre-freeze the bananas: Freezing the bananas before dipping them in chocolate helps the chocolate adhere better and prevents the bananas from becoming too soft during the coating process.
- Prepare your toppings in advance: Chop the peanuts or gather any other desired toppings before dipping the bananas. This ensures you can sprinkle them on the chocolate quickly before it hardens.
- Experiment with toppings: Don’t limit yourself to just chopped peanuts. Get creative and try a variety of toppings like shredded coconut, crushed cookies, mini chocolate chips, or colorful sprinkles. This adds visual appeal and adds an extra layer of flavor and texture to your banana pops.
- Customize the chocolate flavor: If you want to explore beyond plain dark chocolate, try using flavored chocolates like mint or orange-infused dark chocolate. This simple twist can add an exciting and unique taste to your banana pops.
- Work quickly while dipping: As the chocolate begins to set, it becomes harder to coat the bananas evenly. Dip and coat each banana pop efficiently to ensure a smooth and consistent chocolate layer.
- Allow the chocolate to set: Once all the banana pops are coated, place them back on the baking sheet and let the chocolate harden fully before serving or storing. This will ensure a satisfying crunch when you bite into them.
- Get creative with decorations: If you want to take your chocolate covered banana pops to the next level, consider drizzling melted white chocolate or caramel sauce over the hardened chocolate coating for a beautiful and tasty finishing touch.
FAQ: Chocolate Covered Banana Pops
Absolutely! While dark chocolate is recommended for a rich flavor, you can use milk chocolate if you prefer a milder taste. Feel free to adjust the chocolate type based on your personal preference.
It’s best to start with fresh bananas for this recipe. Freezing them after they are peeled and cut allows for a better texture and easier dipping in the chocolate coating.
The banana pops should be frozen for approximately 2 hours or until completely frozen. This ensures that the chocolate coating is firm and the bananas are thoroughly chilled.
Yes, you can store the banana pops in an airtight container in the freezer for up to 1 month. However, for the best taste and texture, it is recommended to consume them within a few weeks.
Absolutely! While chopped peanuts add a delightful crunch, you can explore other toppings such as shredded coconut, crushed cookies, or even mini chocolate chips. Get creative and customize your banana pops to your liking.
Popsicle sticks or bamboo skewers make it easier to hold and enjoy the banana pops, but if you don’t have them, you can use toothpicks or small forks as an alternative. Just be mindful of their size and ensure they are safe for consumption.
Chocolate Covered Banana Pops Vegan
Ingredients
- 4 bananas, peeled and cut in half
- 1 cup vegan chocolate chips or other dark chocolate
- 3 tbsp chopped salted peanuts
- 8 popsicle sticks or bamboo skewers
Instructions
- Cover a baking sheet with parchment paper. Peel the bananas, cut them in half and insert the popsicle stick into the cut end of each banana.
- Place the bananas on the baking sheet and into the freezer for 2 hours or until completely frozen.
- Melt the chocolate by using a double boiler, or using the microwave for 30 seconds at a time, stirring and repeating until fully melted.
- Dip each frozen banana into the melted chocolate until it's coated. Use a spoon to help coat the banana as the chocolate gets lower. As soon as one banana pop is covered in chocolate, sprinkle the chopped peanuts on it. Do this quickly before the chocolate hardens. Repeat this process with each banana.
- Store in the freezer for up to 1 month in an airtight container, or enjoy immediately!
Video
Notes
Nutrition
Conclusion
Chocolate covered banana pops are a delightful and versatile treat that combines the natural sweetness of bananas with the richness of chocolate. With a few simple ingredients and easy steps, you can create these frozen delights for a refreshing snack or dessert.
Whether you stick to the classic recipe or get creative with toppings and flavor variations, chocolate covered banana pops are sure to be a crowd-pleaser. So, grab your ingredients and enjoy the process of making and savoring these delicious treats! If you’re interested in more plant-based frozen recipes like this, feel free to explore my complete Vegan Frozen Desserts Recipes Collection here.
Great idea!! I’m going to make these for my kids and it’s a little healthier or a snack which is nice.
I’m glad you liked the idea! Making healthier snacks for kids is always a good choice.
Loved this so simple and fun!!
Thank you so much I’m so glad you had fun with it!